Single Sign-On
Google Workspace
Configuration guide for setting up SSO with Google Workspace (Google Identity).
This guide explains how to configure SSO for the Connect Platform using Google Workspace as an Identity Provider.
Creating an Application
- Go to the Google Admin Console and log in with an admin account.
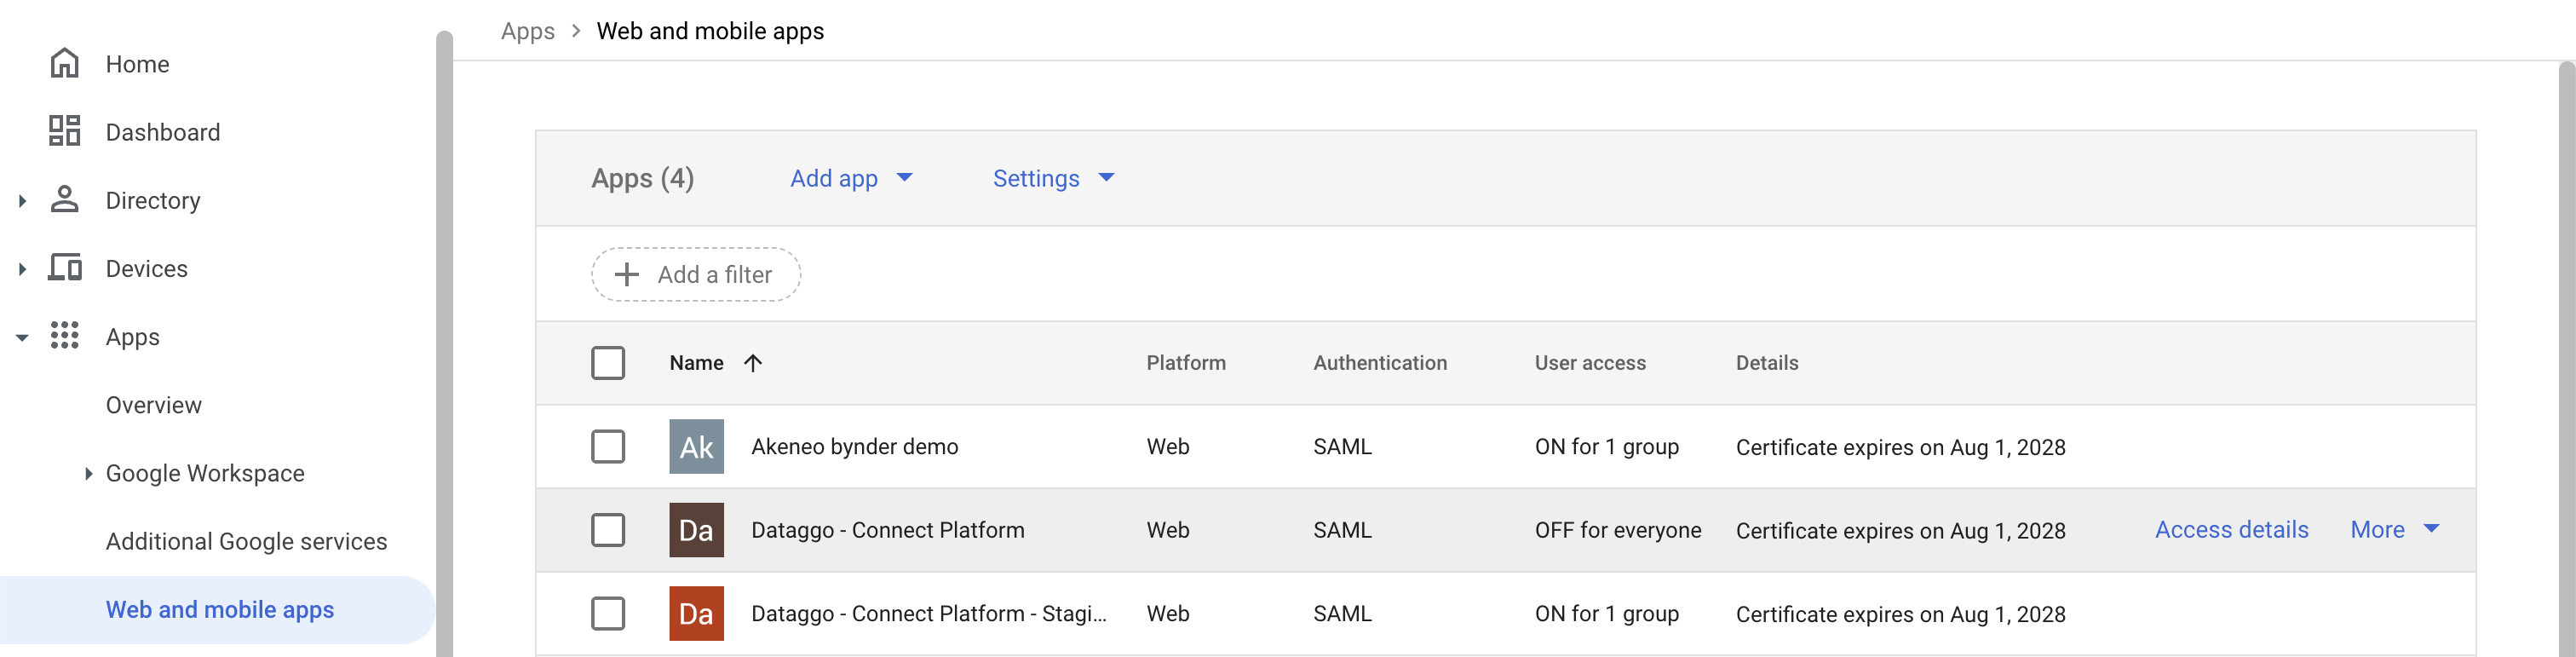
- Navigate to Apps > Web and mobile apps.
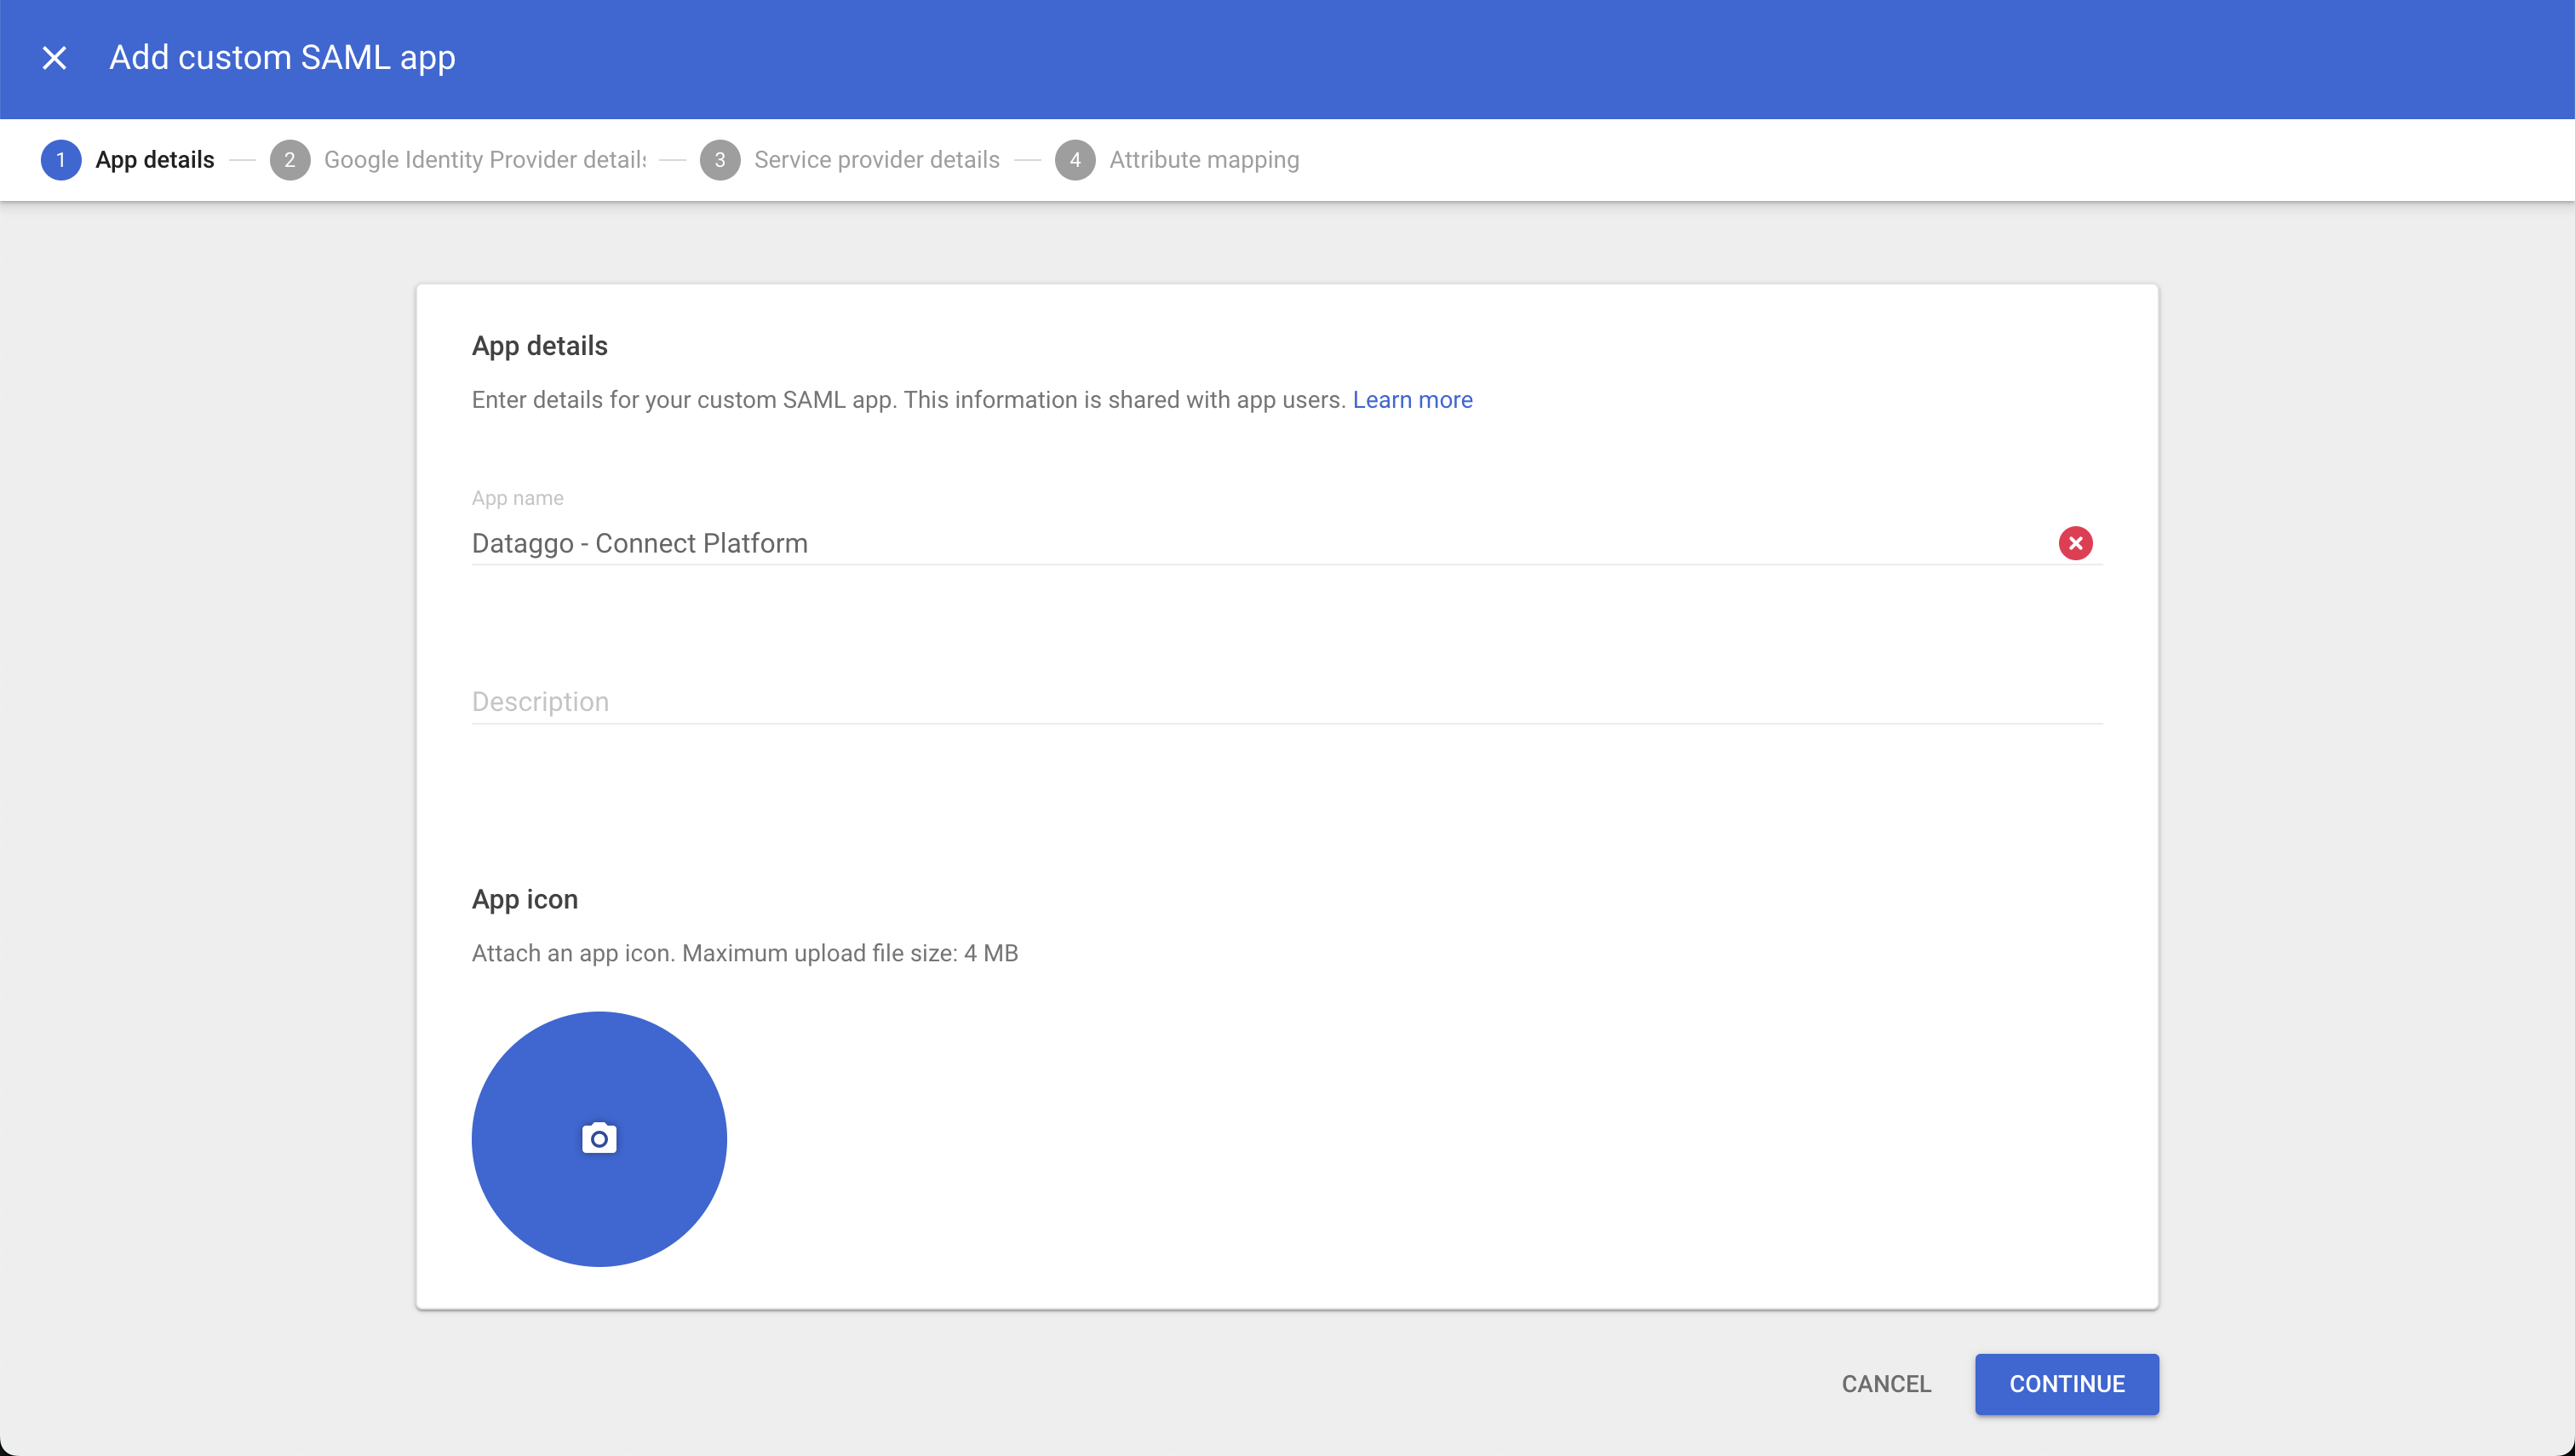
- Click Add App > Add custom SAML app.
- Click Continue.

- Enter the application name (e.g., "Dataggo") and optionally upload a logo.
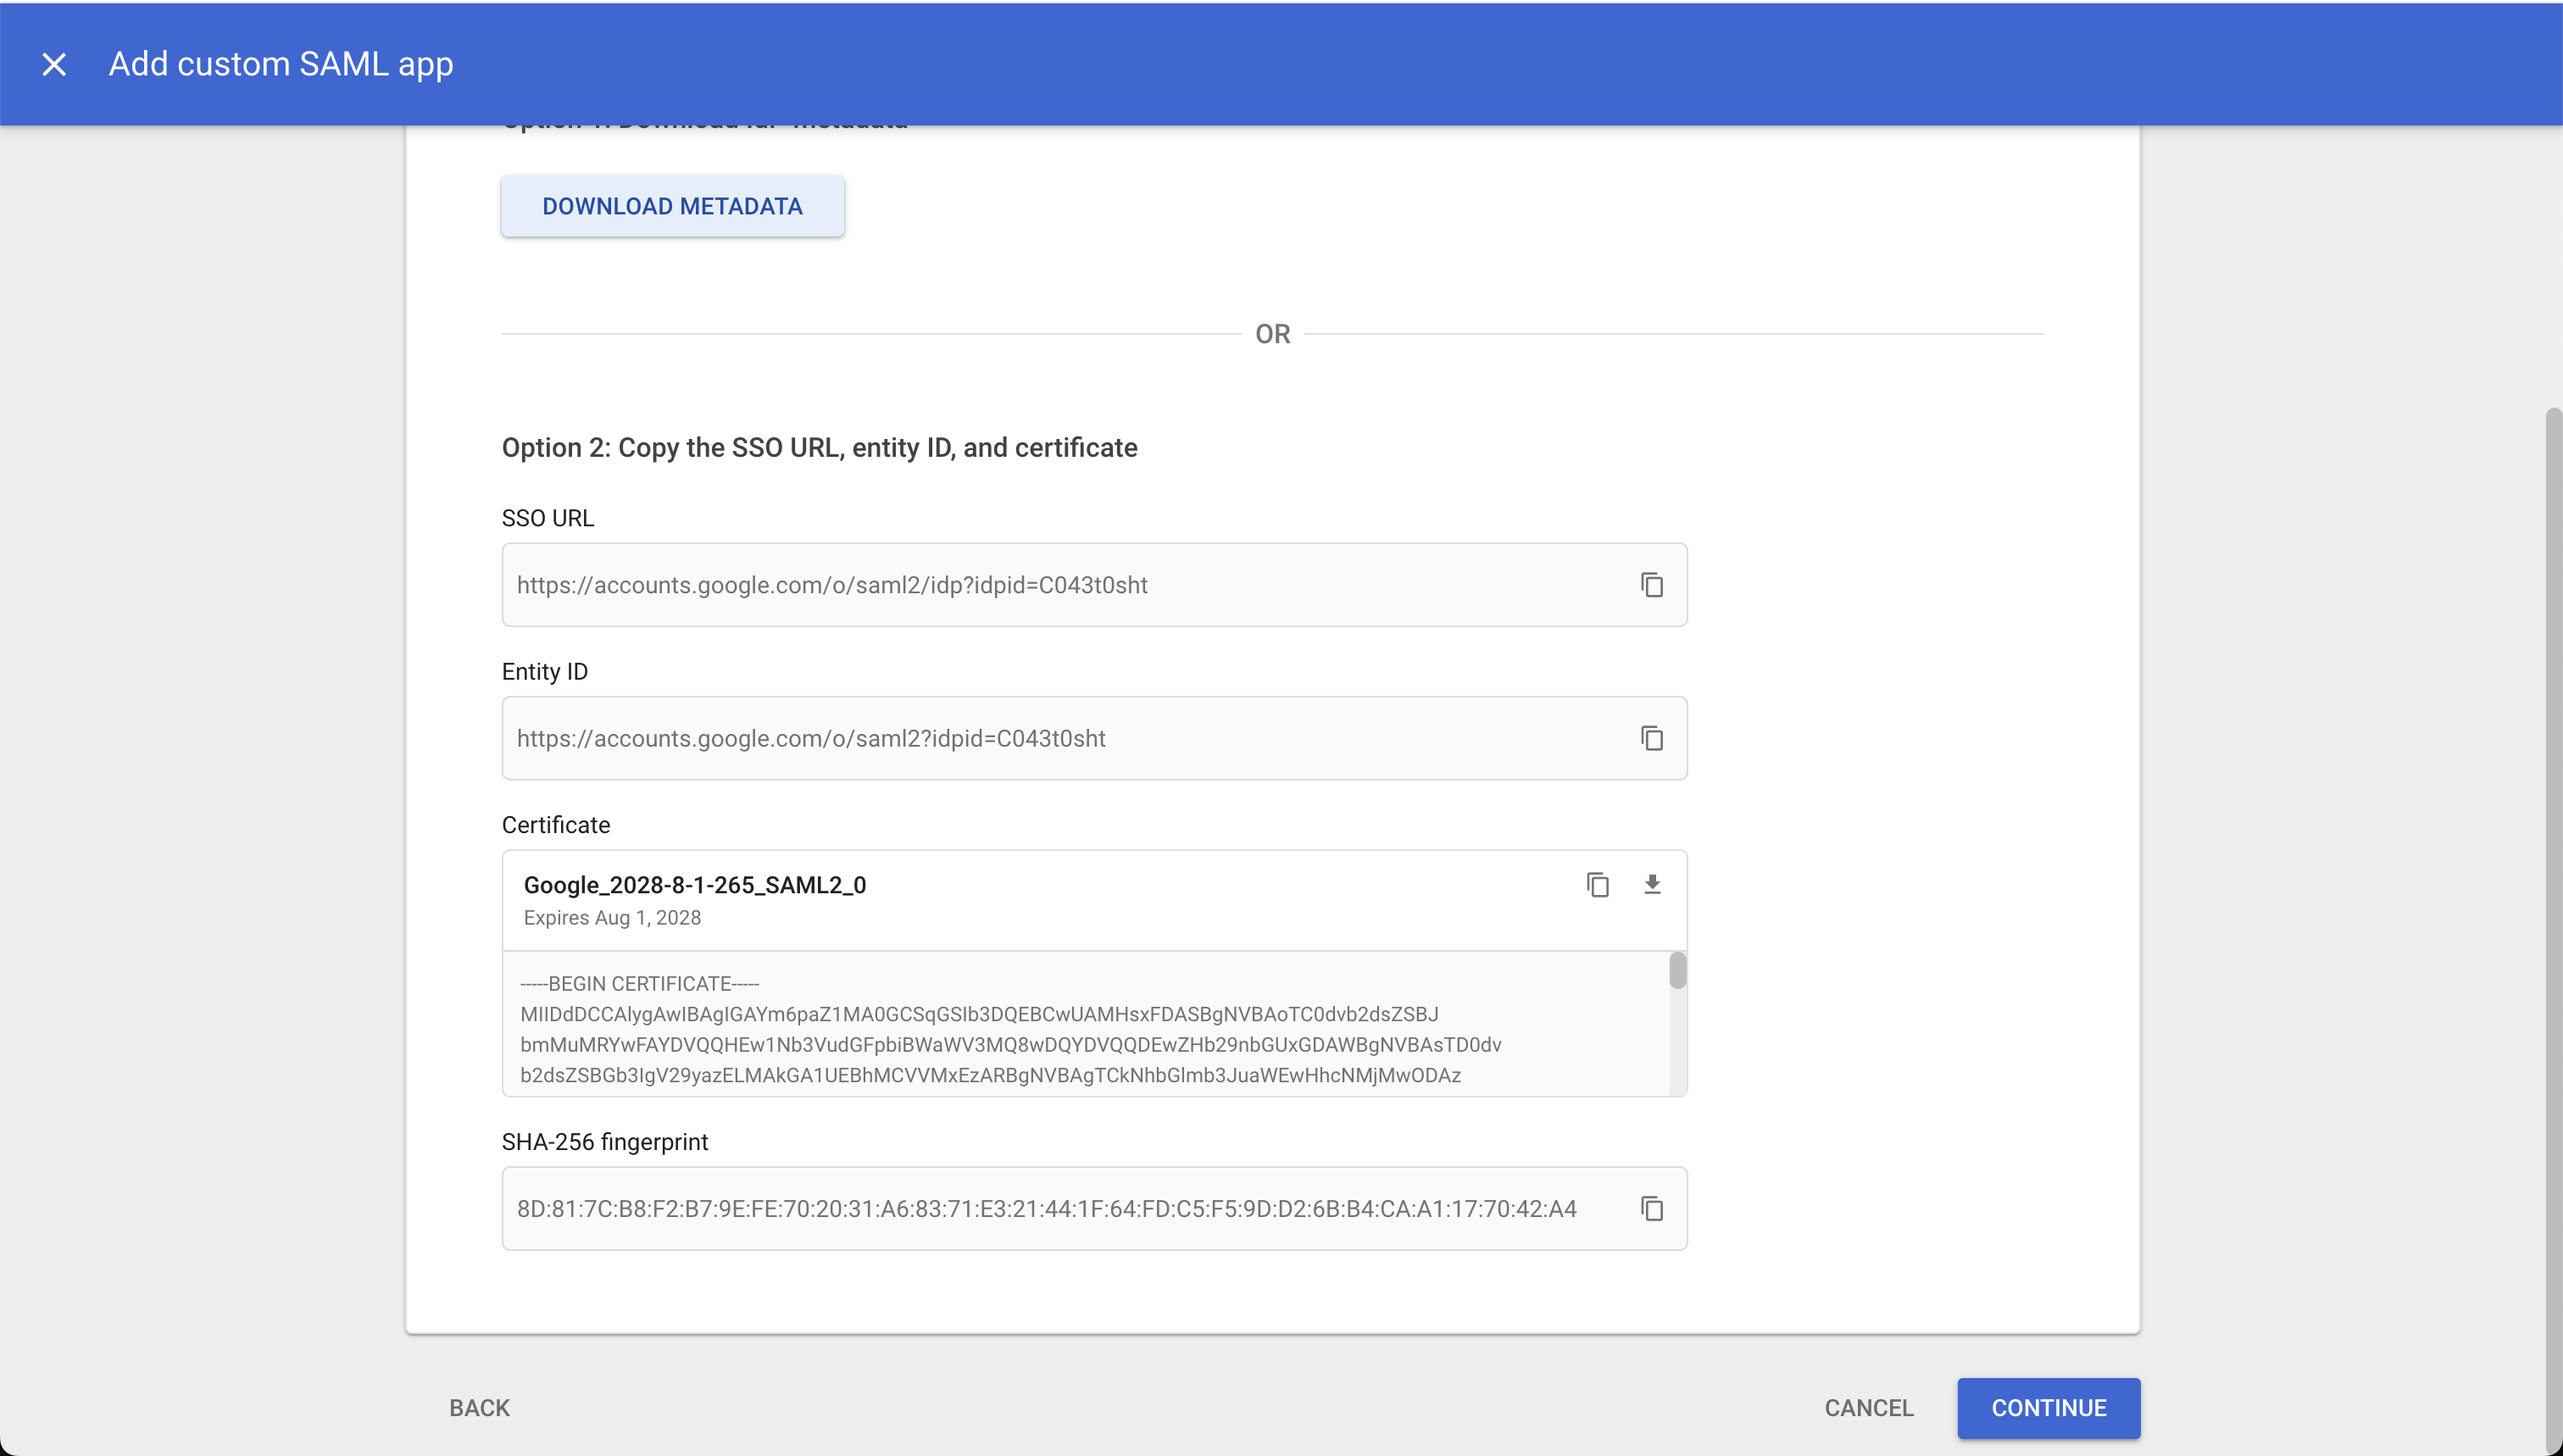
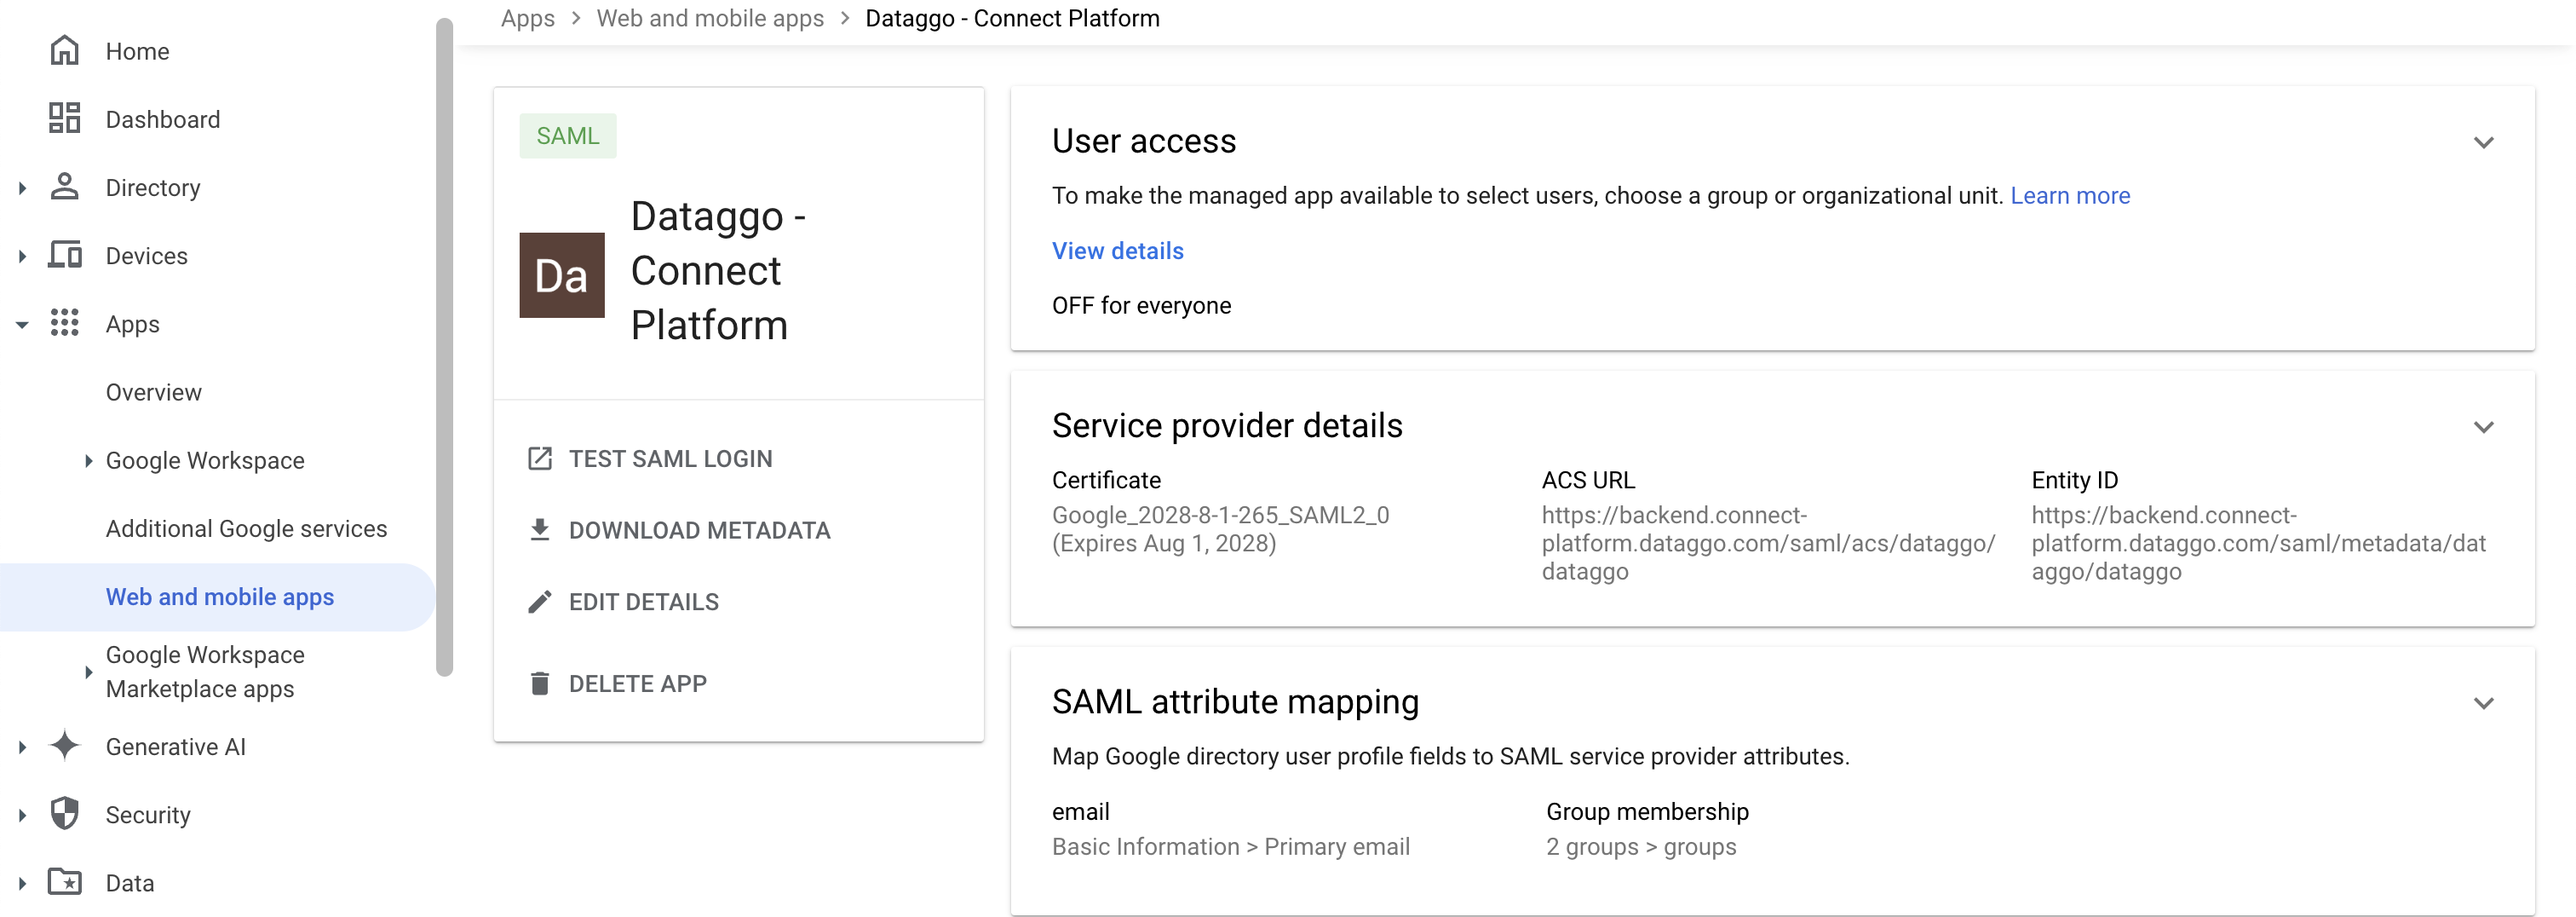
- Download the IDP metadata or note the following information:
- SSO URL (Login URL)
- Entity ID (SSO Entity ID)
- Certificate (Download the certificate file)
- Copy all the values into the fields of the Connect Platform.
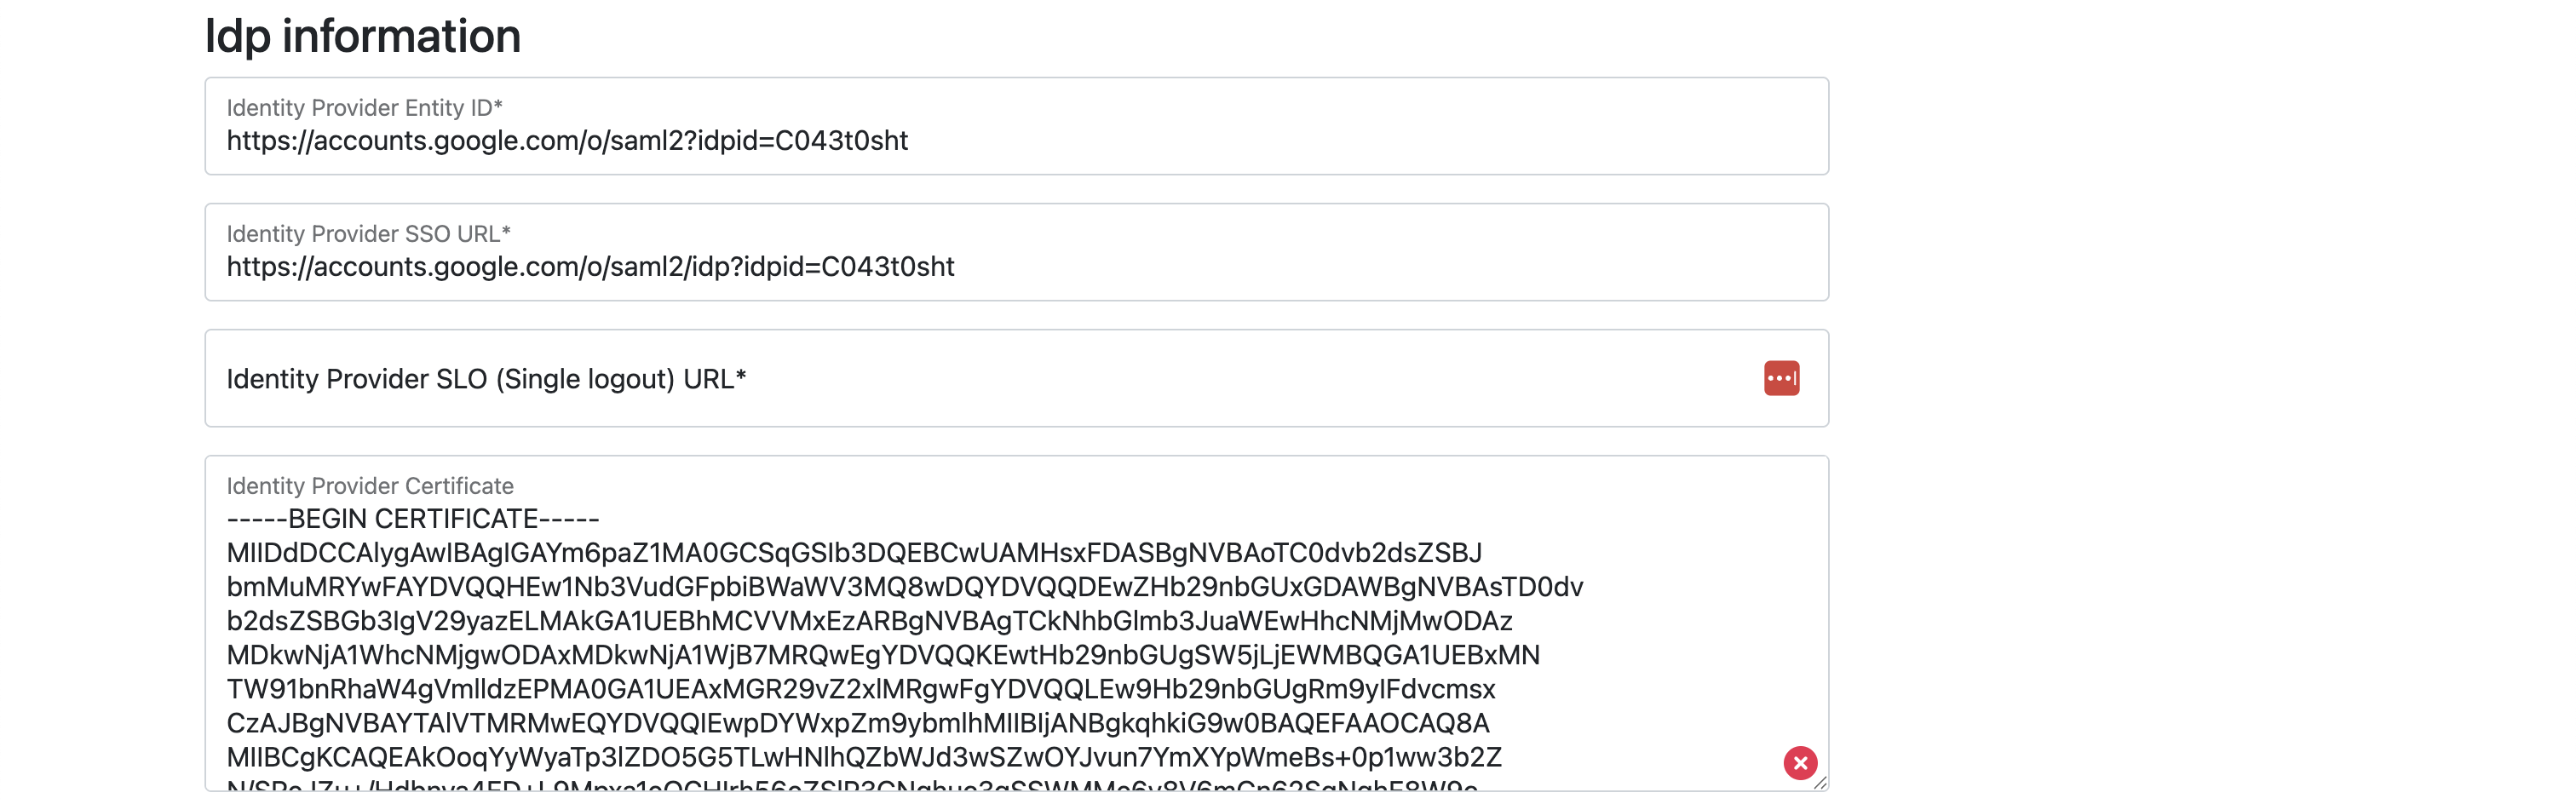
Set Logout URL to https://accounts.google.com/o/logout
- Continue to the next page.
- Copy the information from the Connect Platform into the Google app.

- Set Name ID format to EMAIL.
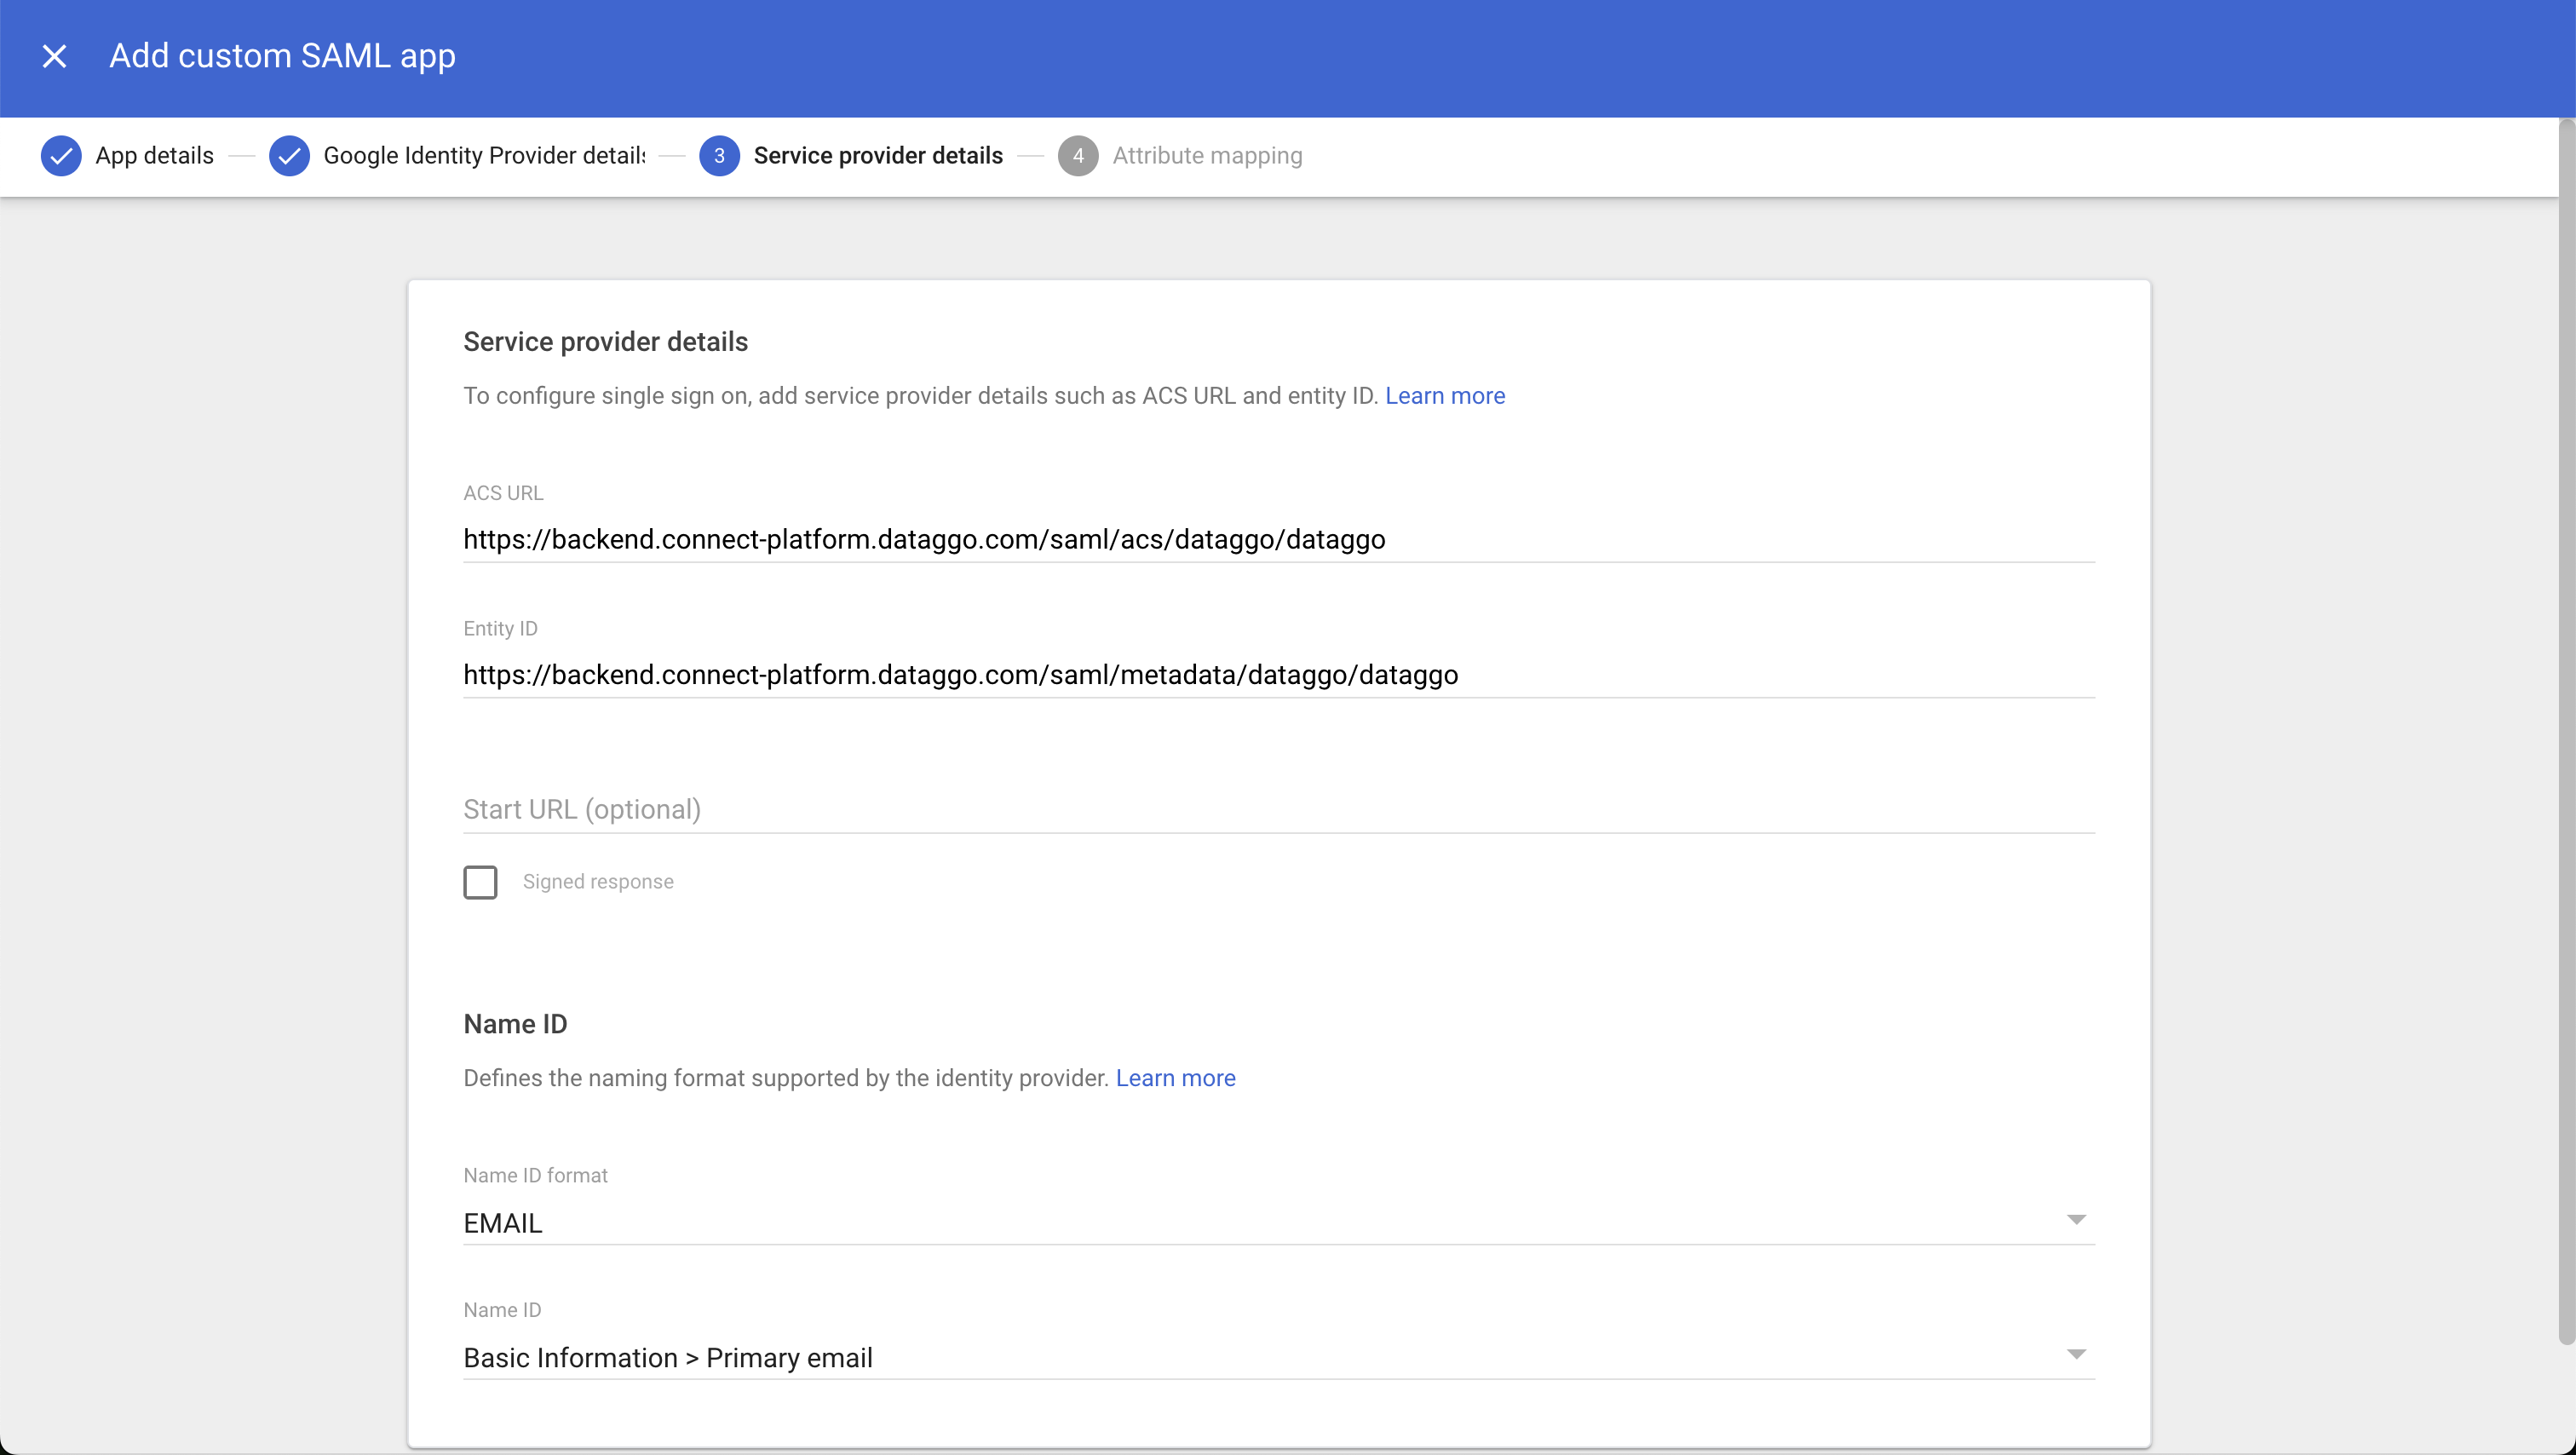
- Click Continue to the next page.
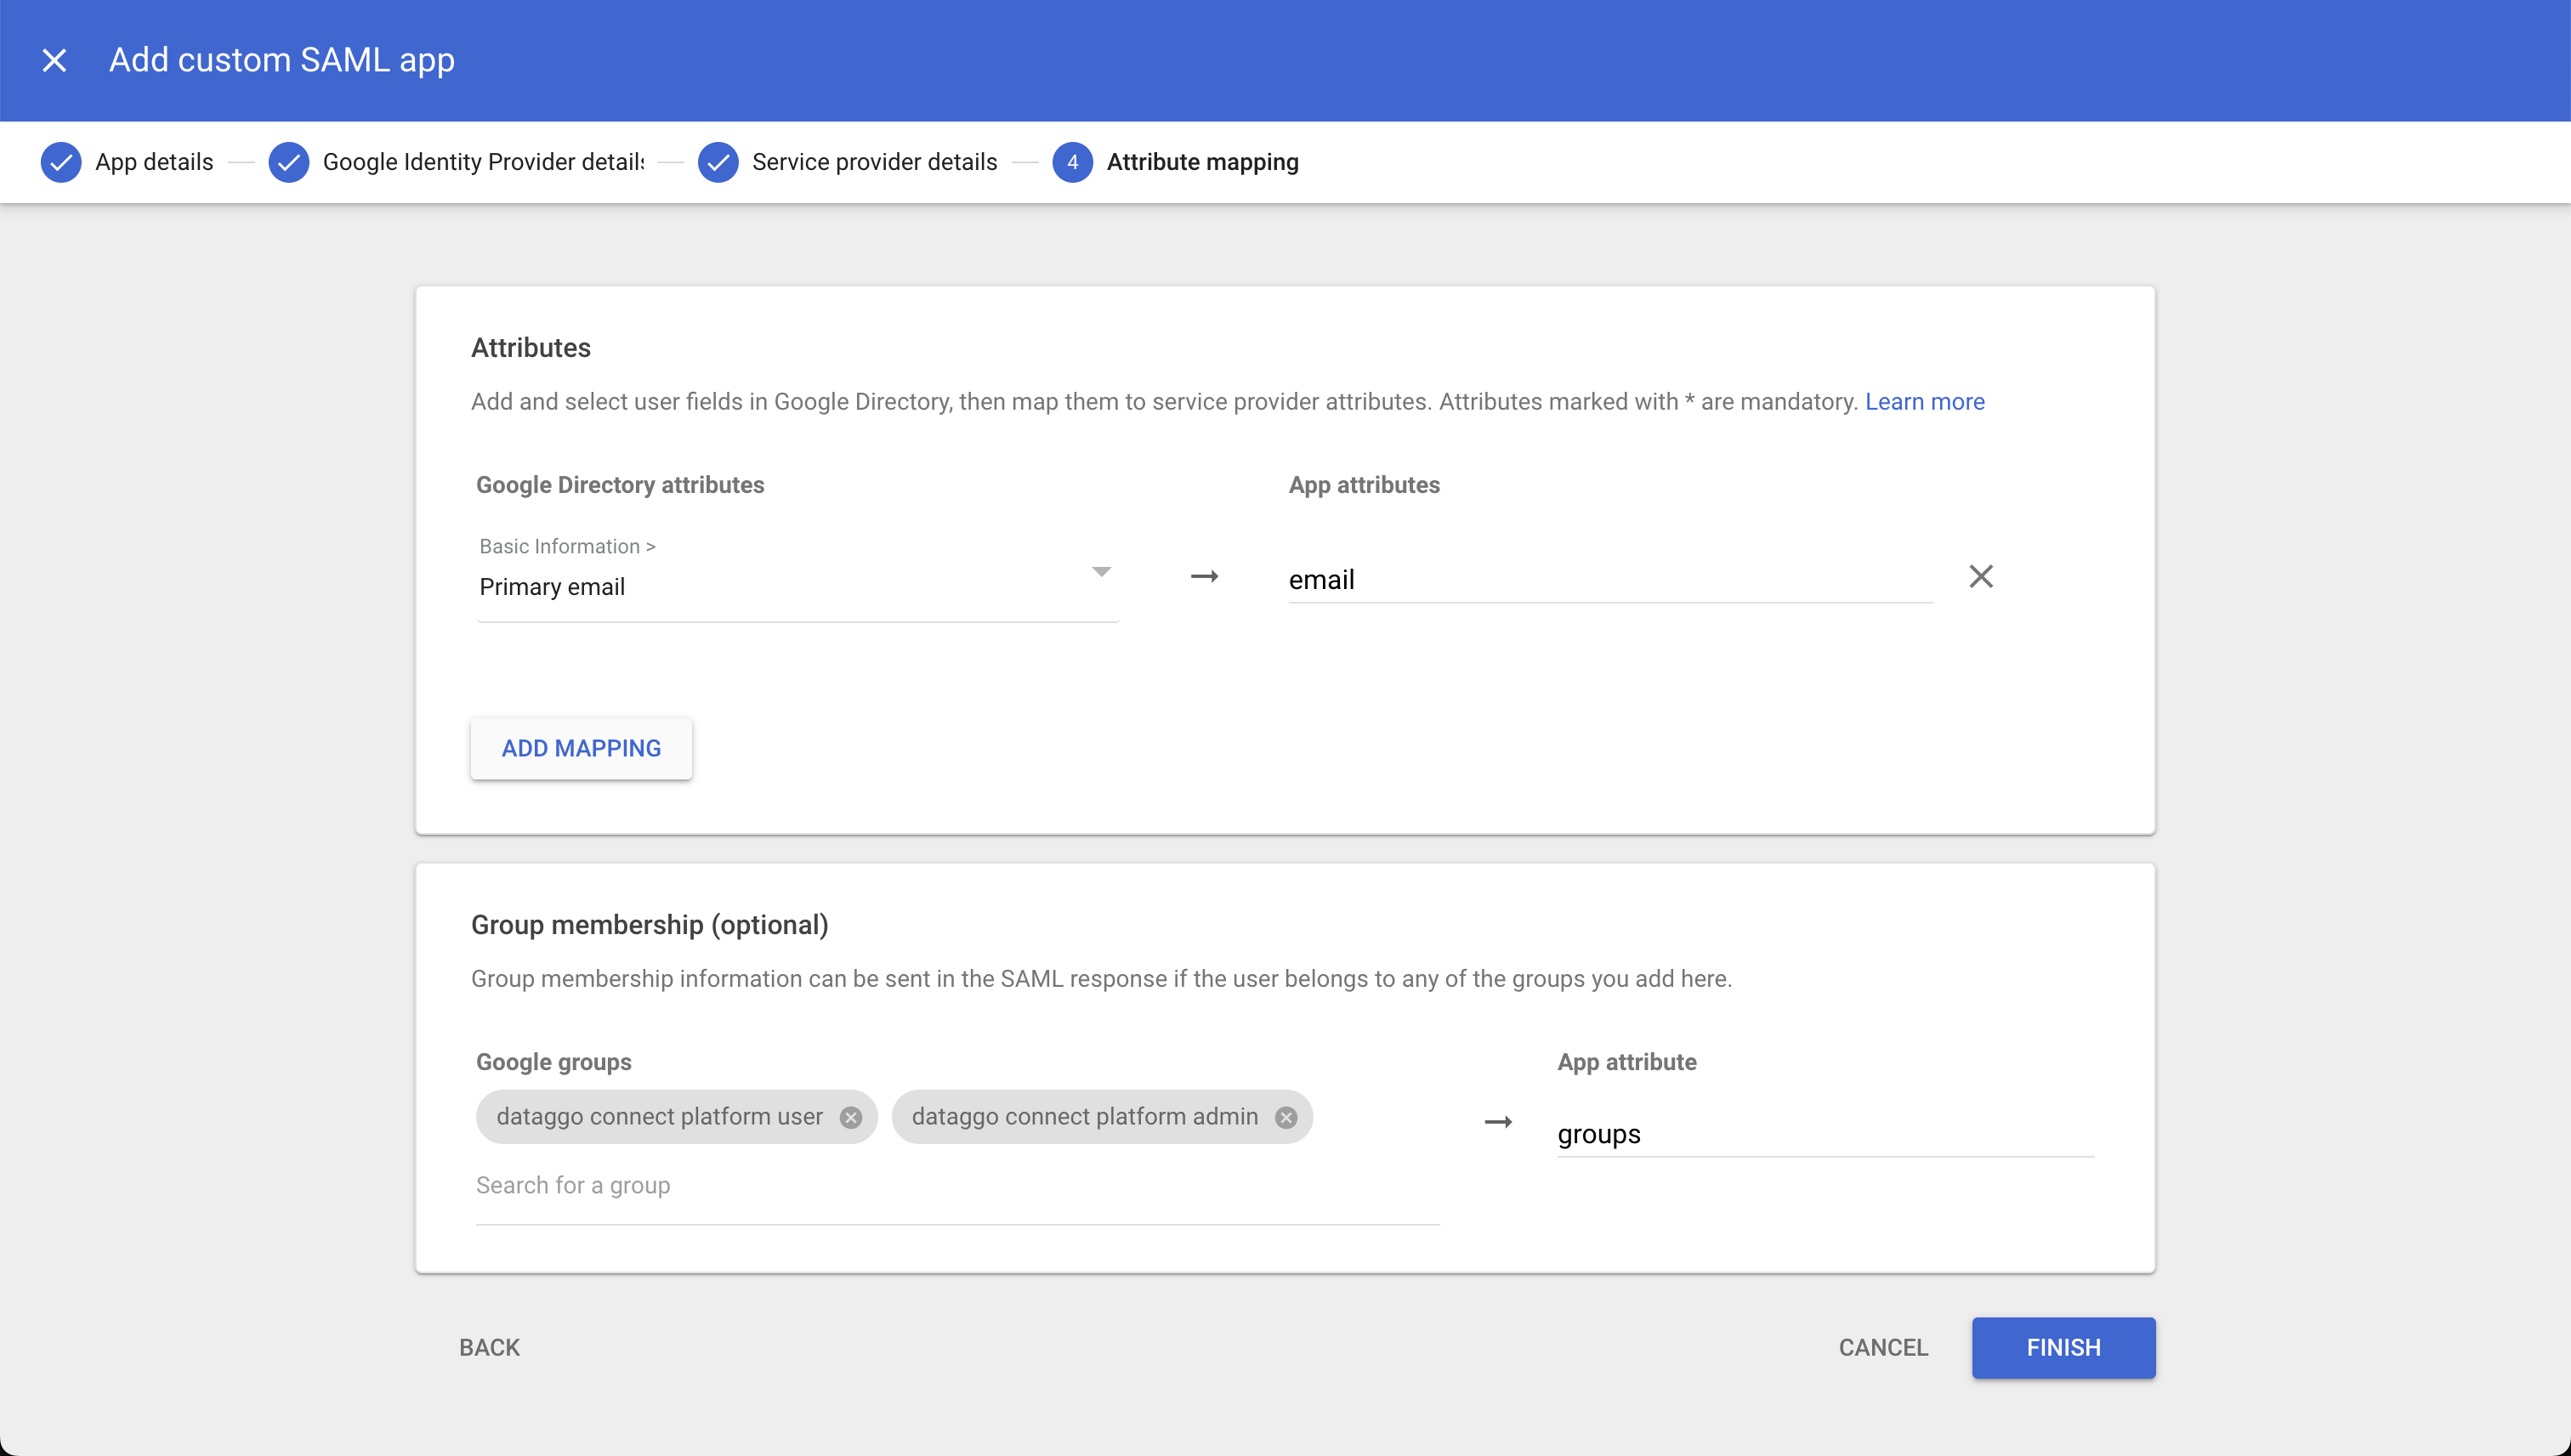
- Add the following attribute mappings to send claims to the Connect Platform:
- Primary email to
email - Group membership to
groups. Select the relevant groups for:- Administrator: Full access
- User: Launch and modify jobs
- Read Only: Read only
- Primary email to
 13. Specify the corresponding 3 groups in the Connect Platform.
- Administrator: Full access
- User: Launch and modify jobs
- Read Only: Read only
13. Specify the corresponding 3 groups in the Connect Platform.
- Administrator: Full access
- User: Launch and modify jobs
- Read Only: Read only
 14. Save the changes in both the Connect Platform and the Google application.
Granting Access Rights to the Google Application
- On the applications page, click the desired application
- By default, the application is not accessible. Click on User access to open a configuration page.
- Select the group you want to grant access to.
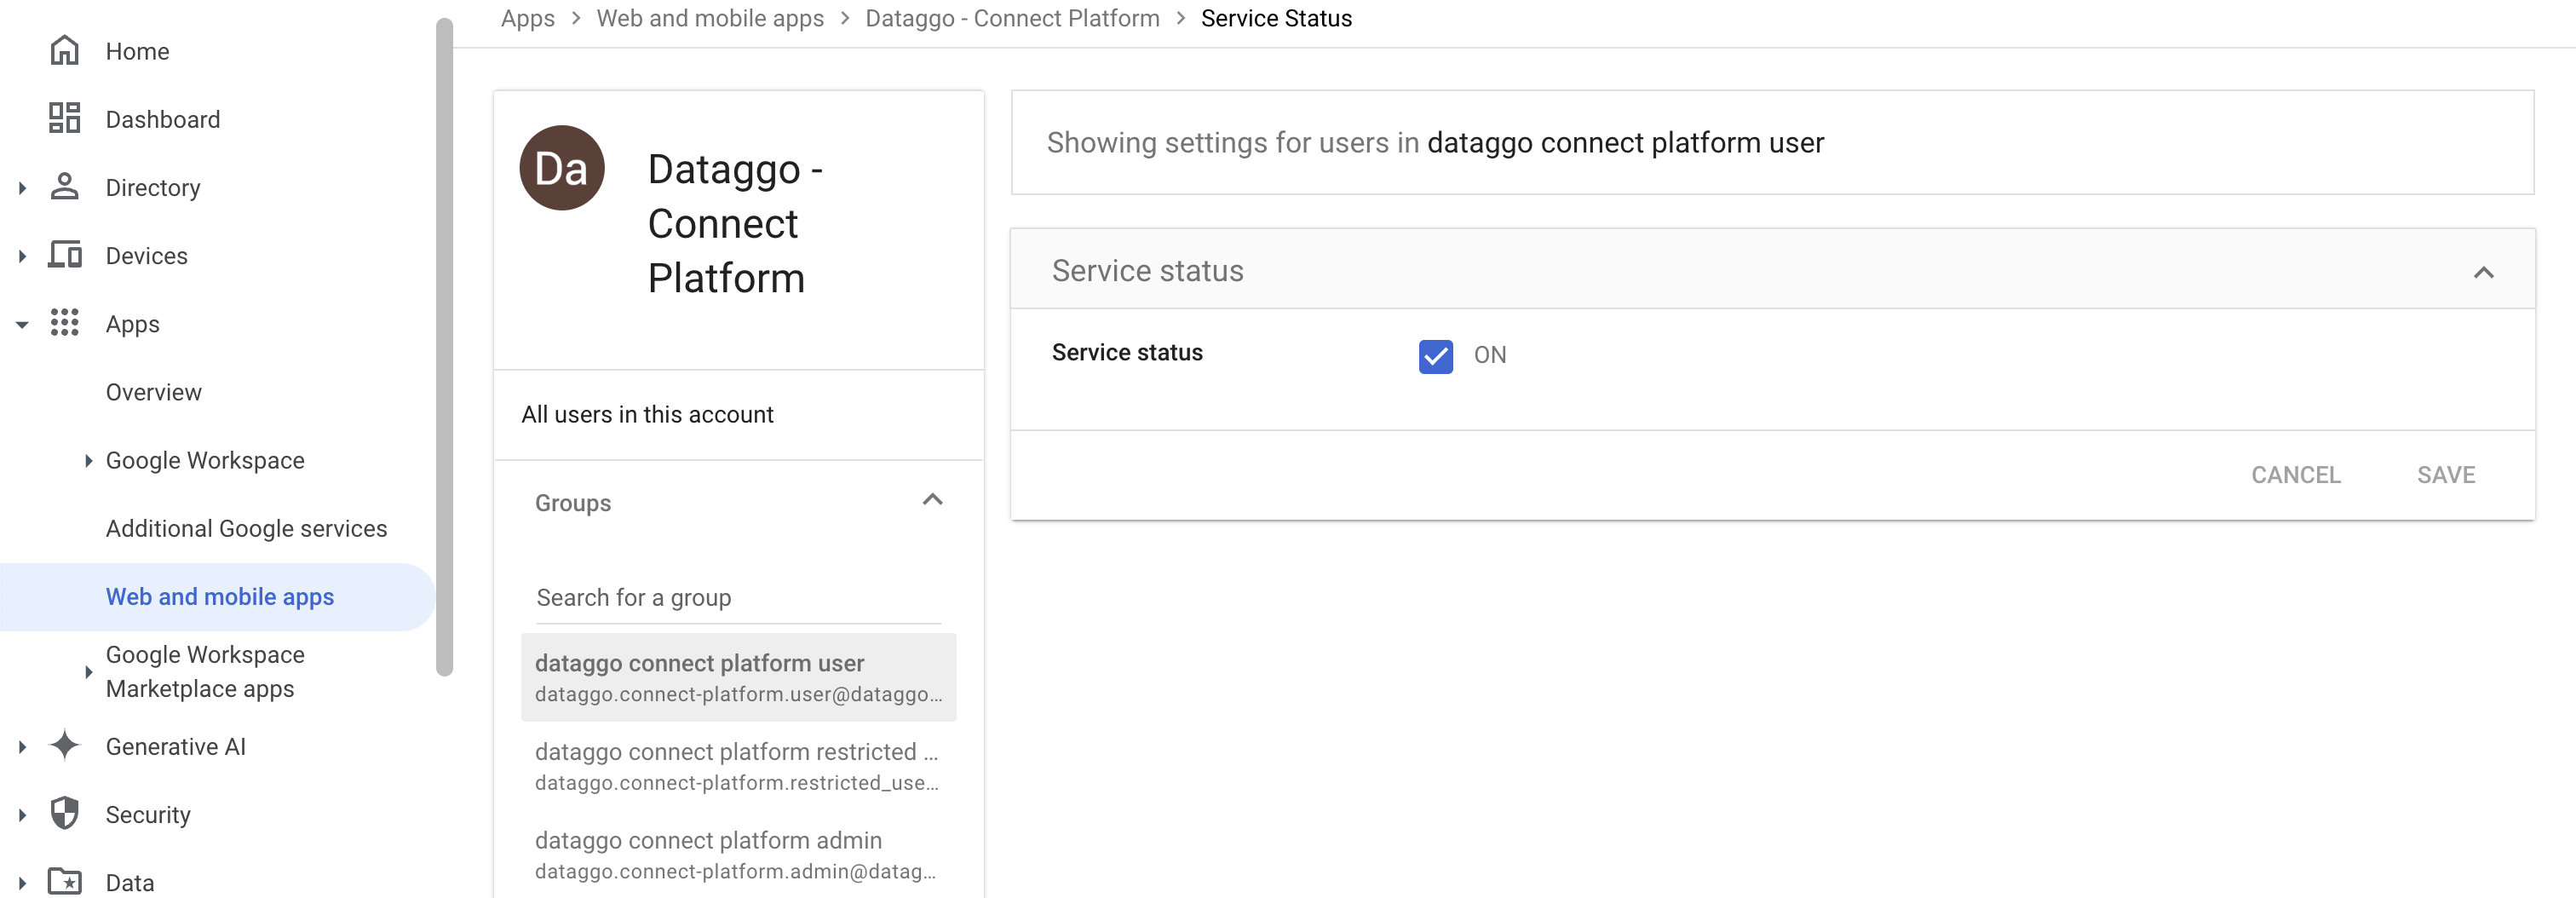
- Toggle the Service status to ON.
- Save and repeat for the other groups.
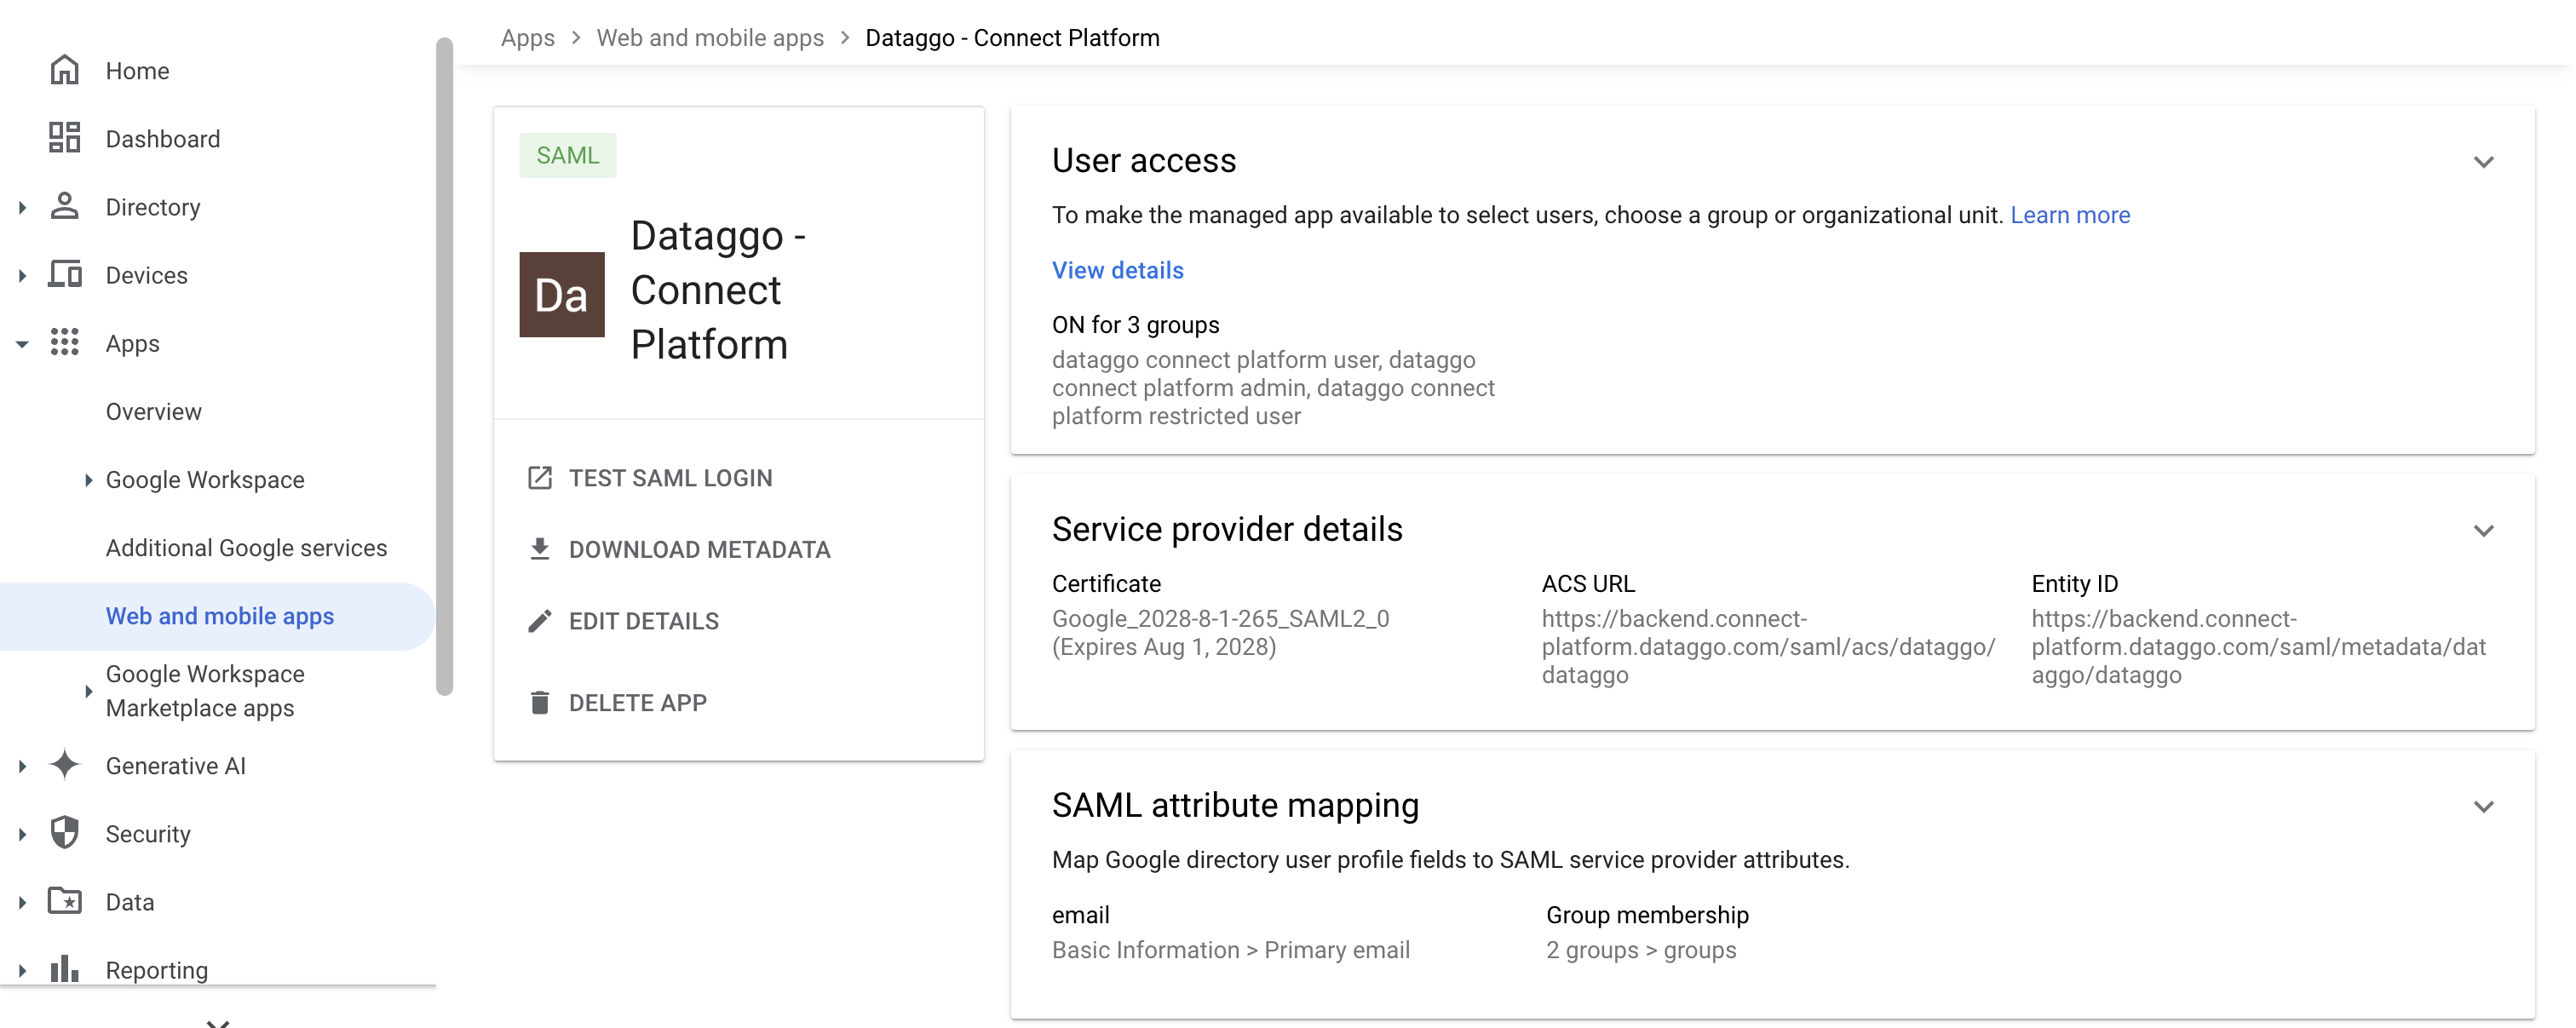
- Back on the homepage, the User Access will be displayed as active for all selected groups.