Single Sign-On
Entra ID (Azure)
Configuration guide for setting up SSO with Microsoft Entra ID (Azure Directory).
You can find below the detailed configuration to set up SSO on Microsoft Entra.
Creation of an application
To configure SSO, you need to create an application in Microsoft Entra.
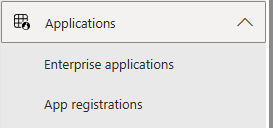
- Go to Microsoft Entra admin center
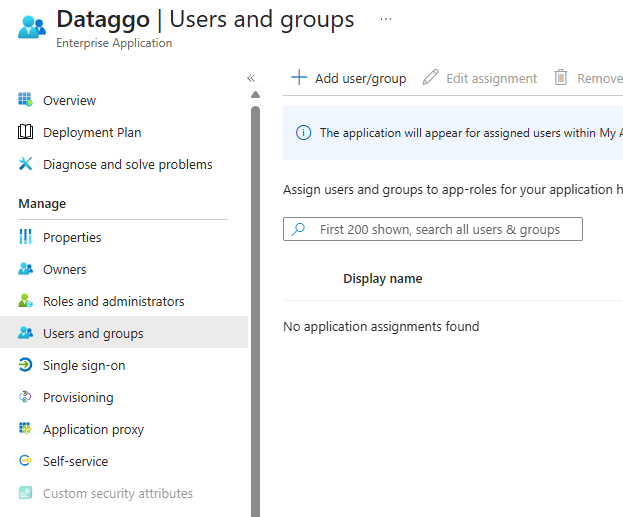
- Navigate to : Applications>Enterprise Applications
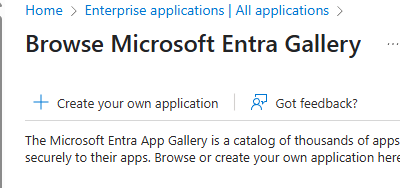
- Click New application.

- Select Create your own application
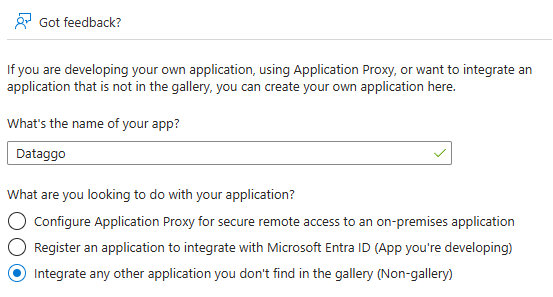
- Put the name (e.g, Dataggo) and select Integrate any other application you don't find in the gallery (Non-gallery)
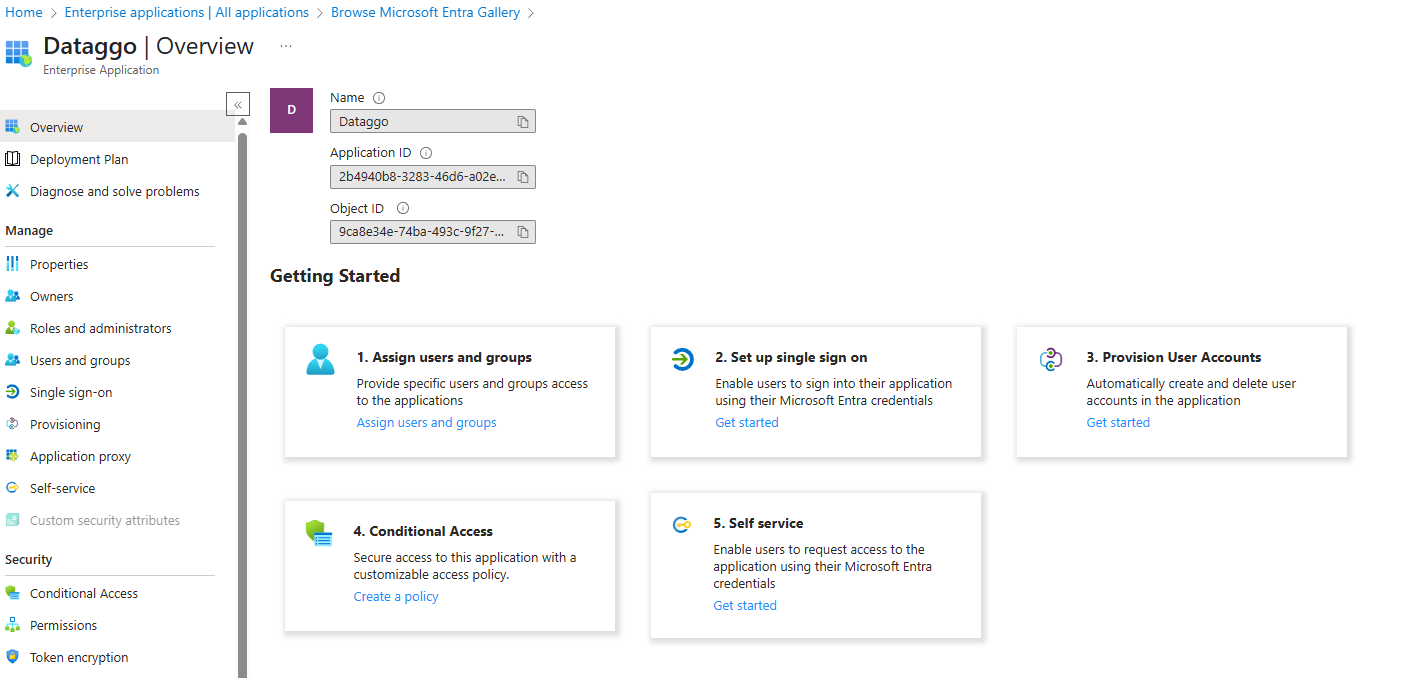
- After creation, go to Single sign-on
- Choose SAML as the single sign-on method.
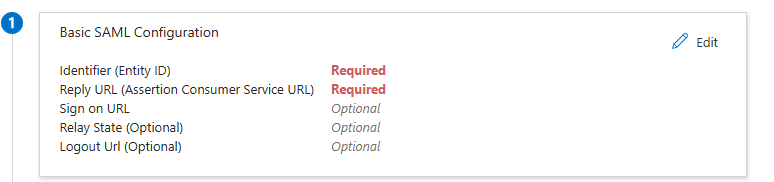
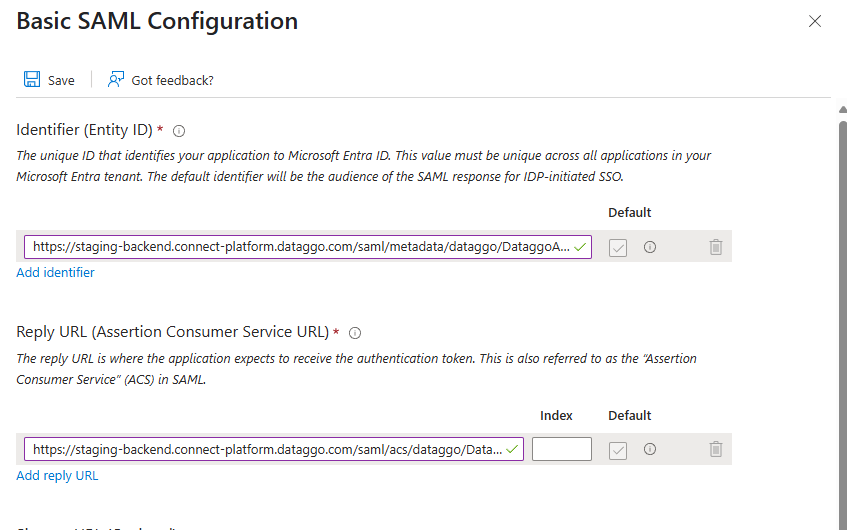
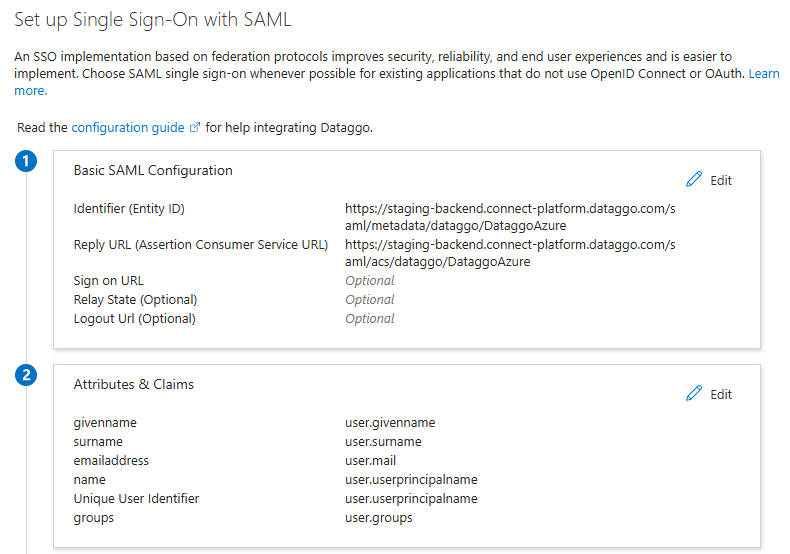
- Fill the Basic SAML Configuration
- Fill in the Basic SAML Configuration fields using the values provided by the Connect Platform.
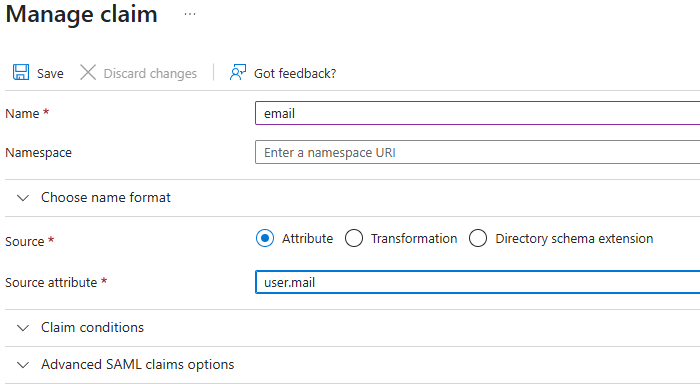
- Configure Attributes & Claims.
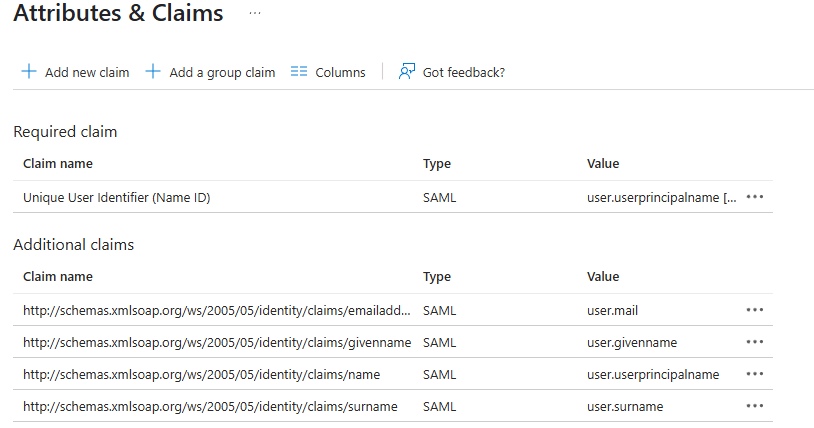
- Add the email claim.
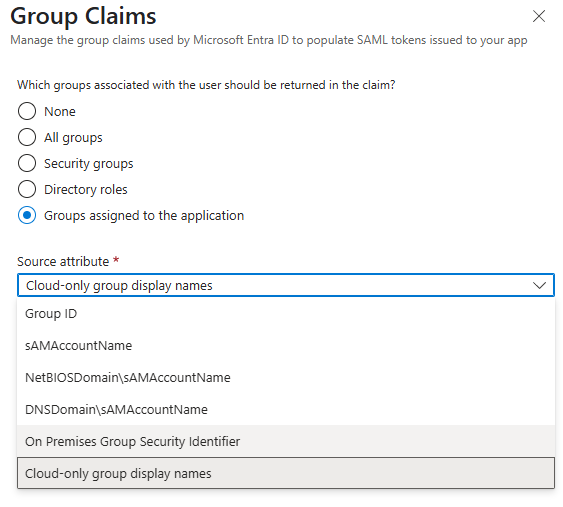
- Add the groups claim:
- Groups assigned to the application
- Source attribute: Cloud-only group display names
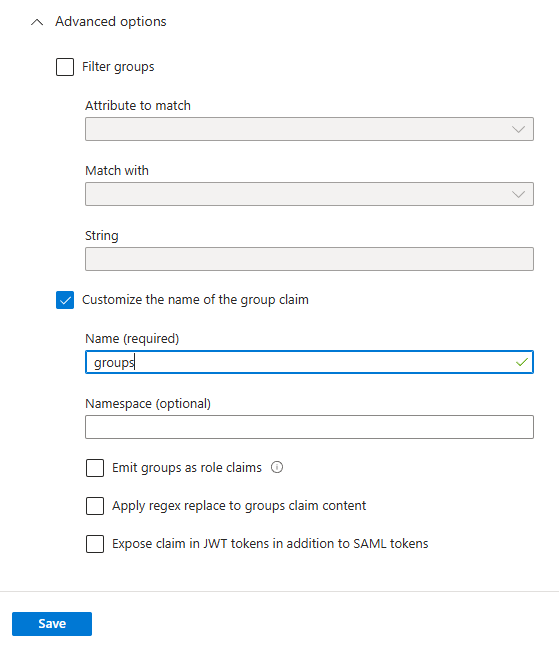
- Fill in the advanced options for the groups claim.
- Confirm you see the following claims configured.
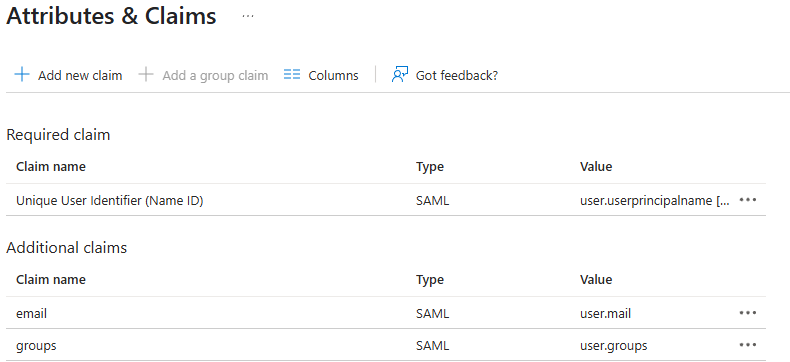
- After validation, the claims screen should look like this:
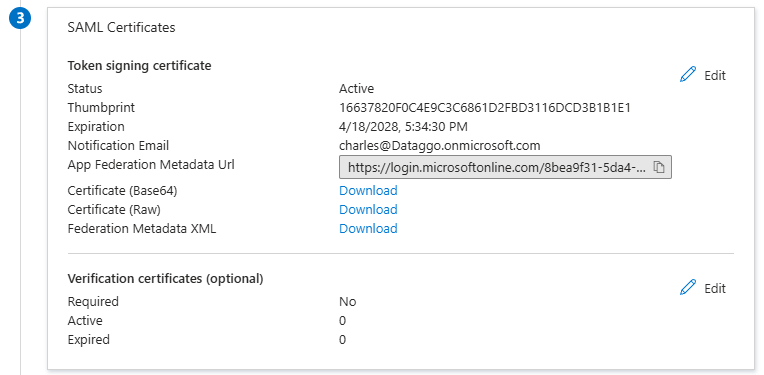
- Download the certificate needed for Connect Platform configuration.
- Copy the Identity Provider (IdP) information.
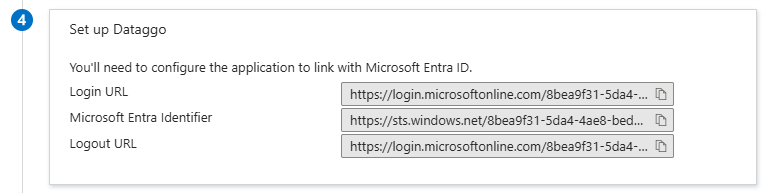
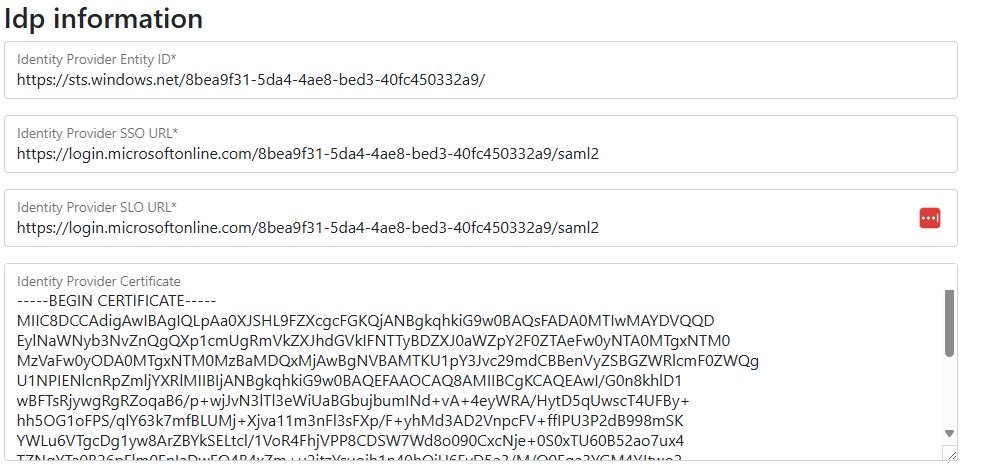
- Paste the IdP information into the Connect Platform SSO configuration.
- Save the configuration.
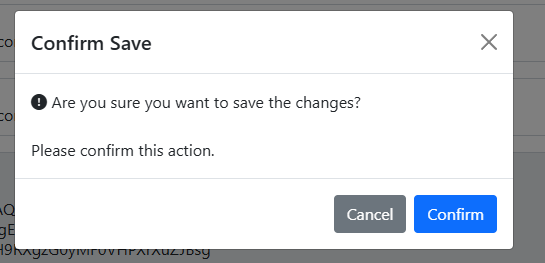
- Confirm the save was successful.

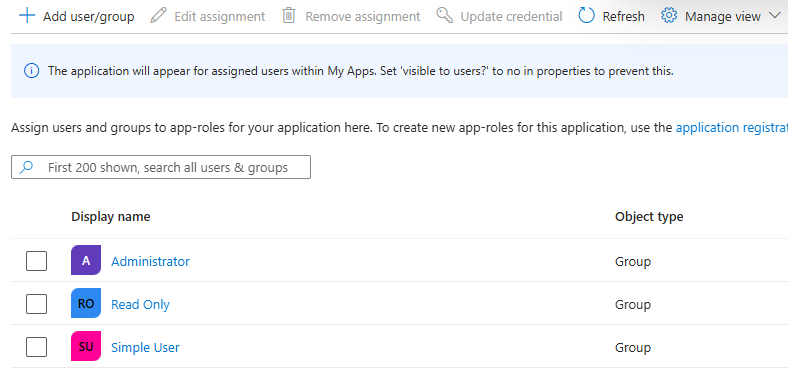
Create the groups
For the Connect Platform, three user groups are required:
- Administrator: Full rights
- User: Can launch jobs or modify some configurations
- Read only: Can access logs only
Steps to create groups:
- Create user groups in Azure.
- You can put the label you want
- Synchronize the groups into the Connect Platform.
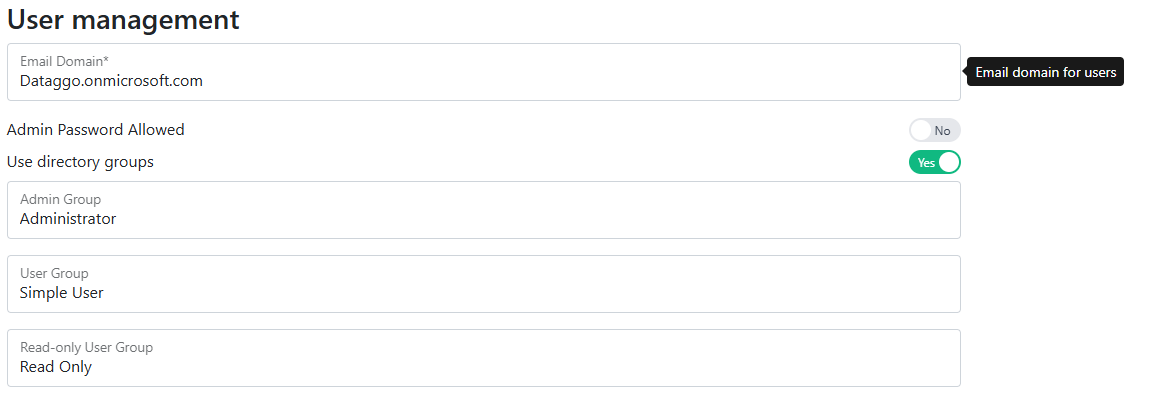
- Save your configuration in the Connect Platform.
- Confirm successful save.
Everything is now configured and ready to use.